Why Are The Leaves Of My Orchid Wrinkled & Leathery, & How To Fix Them
The Three Most Common Causes Of Wrinkled Orchid Leaves & What To Do About Them
Have you noticed your orchid’s leaves looking wrinkled, leathery, limp and droopy lately? Are dry lines and veins appearing in previously firm, hydrated leaves? If so, there clearly is a problem — a dehydration problem. An orchid with flaccid, wrinkled leaves is definitely telling you that it is dehydrated. But, why is the question. While this may appear to be a simple watering problem, it is not quite that simple, since both an over-watered and an under-watered orchid display the same dehydration signs of limp, wrinkled leaves. Yes, somewhat counterintuitively, an overwatered orchid will also appear dehydrated. To get to the “root” of this problem, we must dig deeper. That’s right, to find the cause of your orchid’s wrinkled leaves, we must examine your orchid’s roots.
Let’s get started right away because, allowed to linger, these signs of dehydration can mean dire consequences for your plant. Now, let’s find out how we can perk up those leaves, and the health of your orchid in the process.
**Discover how to revive a dehydrated orchid with phytochemicals orchids love in black tea here…
**Find out how to stimulate root growth on an orchid with dying roots here…
Note: This post contains affiliate links for which a small commission may be earned if you decide to make a purchase through a link.
Why Are The Leaves Of My Orchid Wrinkled? The Three Most Common Causes Of Dehydrated, Wrinkled Orchid Leaves
The most common causes of a dehydrated orchid are: underwatering, over-watering/root rot, and insufficient humidity. As soon as you see wrinkled leaves, identify which cause is the culprit by doing the following…
Why Is My Orchid Dehydrated? Identify The Cause By Examining Your Orchid’s Roots
First, Know What Healthy Orchid Leaves Should Look Like
Healthy orchid leaves should be smooth, upright and stiff, and exhibit a light, bright grass green color. If your orchid displays wrinkled, leathery, limp leaves instead, your first instinct will likely be to water your orchid…. and water it… and water it some more. After all, it is dehydrated, right? So, more water would seem like an obvious solution.
Unfortunately, as we discussed above, dehydration can actually be a symptom of many problems, so unless you are sure dehydration is the issue, you may end up treating a problem that doesn’t exist. Unfortunately, this wastes precious time, and may kill your orchid’s roots in the process, effectively watering your orchid to death. Having seen many orchids in pots that lack drainage suffer the same fate, I speak from experience. Instead, avoid assumptions and diagnose the actual issue by taking a few moments to examine your orchid’s dry roots:
Inspect Your Orchid’s Roots To Treat Its Leaves
- Once you notice your orchid’s leaves appear wrinkled and dehydrated, carefully remove your orchid from it’s pot and potting mix, and look closely at its dry roots. If you want more detail about repotting, you can find it here. One thing to remember is that time is of the essence when dehydration signs appear.
- After doing a visual and touch inspection of your orchid’s roots, take note of their appearance, texture, and color, and scroll down below to see which “Orchid Dehydration Cause” signs match up with what you observe.

Why Are The Leaves Of My Orchid Wrinkled? Orchid Dehydration Cause #1: Underwatering
Signs Of An Underwatered Orchid:
In addition to wrinkled, limp leaves, your orchid’s roots are very telling. For example, healthy Phalaenopsis roots are plump and silvery even when dry, but they probably could use some water. When happily hydrated, they take on an even more plump and green appearance. In contrast, underwatered roots have a dry, shriveled appearance that can even take on a brittle texture depending on how severe the underwatering is. Your orchid’s potting medium will also feel dry to the touch.
Solution To An Underwatered Orchid:
If you see any of the signs listed above, and have been lax with your watering routine, you may simply have an underwatered orchid. Happily, in this case, the solution is simple — water your orchid’s roots immediately.
Quick & Drastic Measure To Cure A Moisture Starved Orchid:
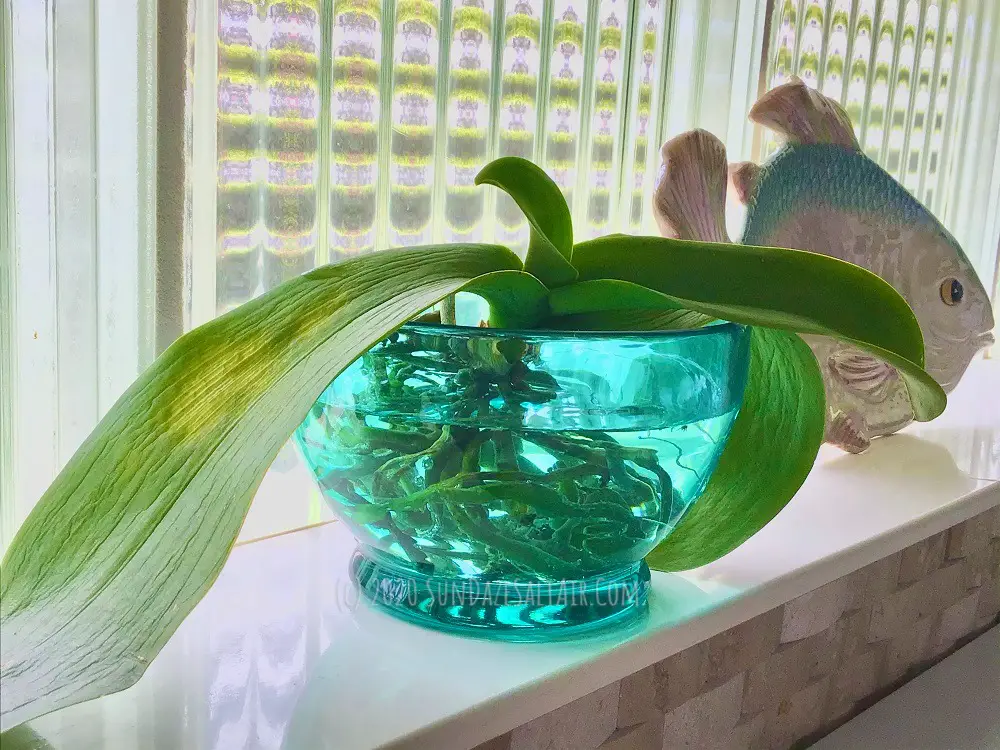
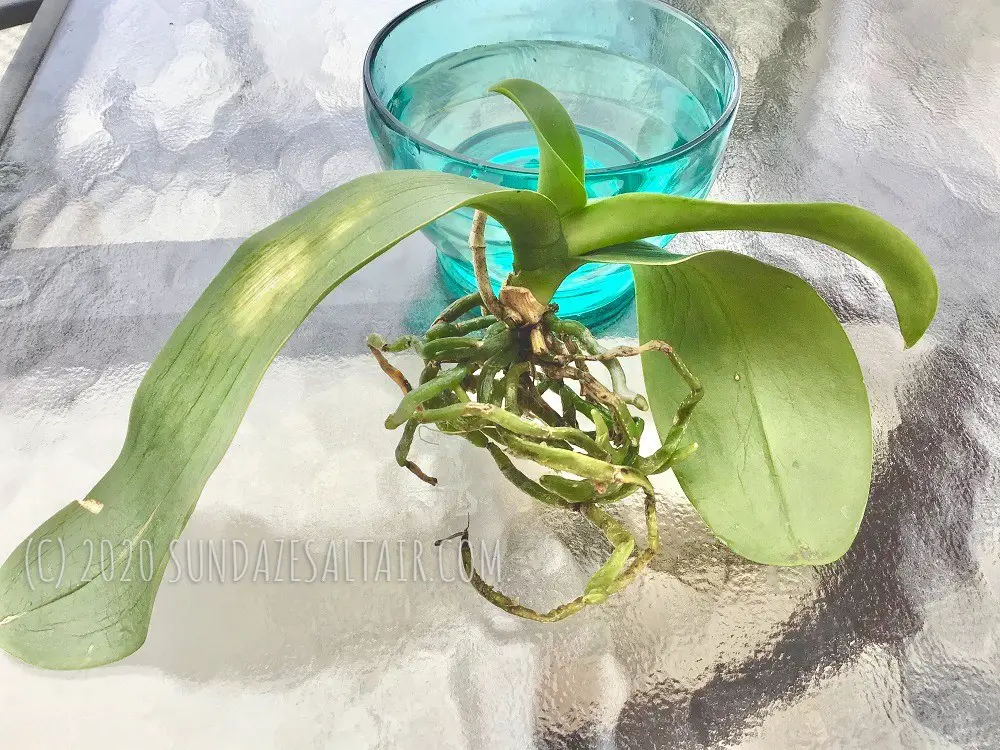
If simple watering is not sufficient and your orchid’s leaves continue to look wrinkled and droopy with shriveled roots, try a modified “water culture” method. Simply stated, submerge only your orchid’s roots in a bowl of room temperature water, taking care to keep its crown and leaves dry. Leave your orchid like this for 15 to 20 minutes a day until you see improvements in the hydration of your orchid’s leaves and roots, and its leaves “perk” up.
If the roots are not too badly dried out and damaged, your orchid should respond relatively quickly to this infusion of hydration. If symptoms don’t improve, you may have a more serious, less superficial, issue, such as dehydration from advanced root rot. Refer to “Orchid Dehydration Cause #2: Overwatering” below.
Prevent Underwatering:
Prevent future underwatering by watering more consistently but, rather than on a set schedule, use the “touch” test to only water when your plant’s potting mix feels dry.
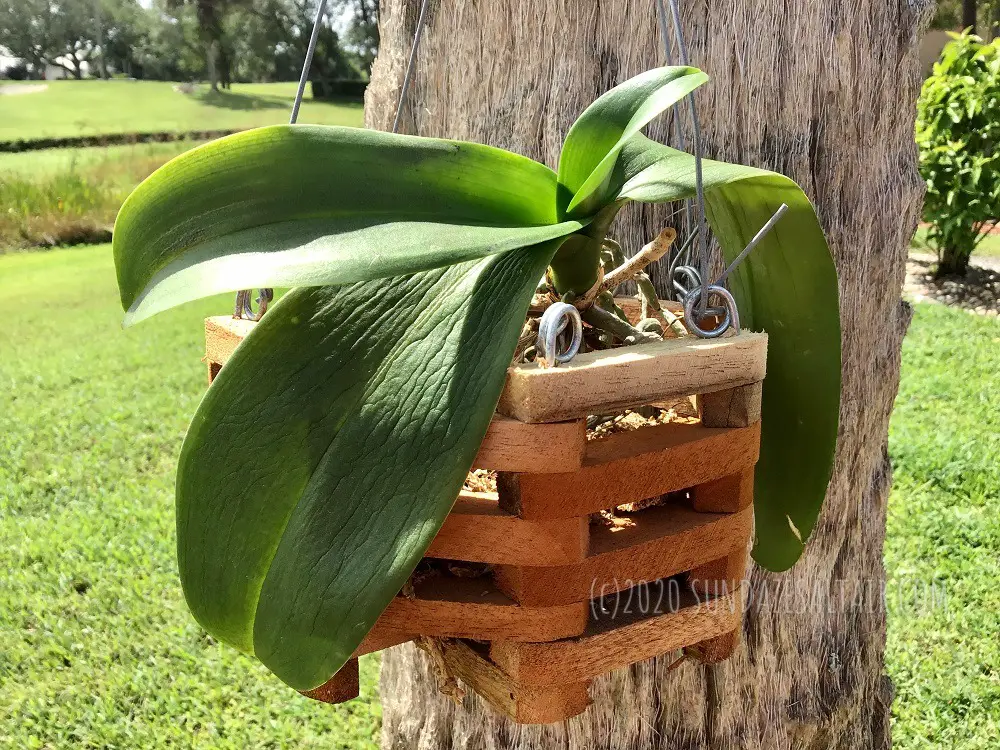
In addition, look for signs of dehydration by taking a few seconds to monitor your plant’s leaves and especially keep an eye on its roots. Clear plastic pots with ventilation holes are helpful for this and, of course, orchid hanging baskets make root inspections easy. If any signs of dryness mentioned above appear, try the methods above. If your plants don’t perk up pretty quickly, the dehydration may be a symptom of a more serious problem as we see in the next possible cause…

********
Why Are The Leaves Of My Orchid Wrinkled? Orchid Dehydration Cause #2: Overwatering/Root Rot
Signs Of An Overwatered Orchid:
Like an underwatered orchid, an overwatered orchid will similarly display the ubiquitous wrinkled, shriveled, droopy leaves, and dry, shriveled roots. However, overwatered orchid roots may also be either dry, brittle, and papery or, on the other extreme, very soft and “mushy” feeling to the touch. Why the two very different signs and symptoms? They are simply different stages of an unfortunate consequence of too much water — the dreaded root rot.
While it seems counterintuitive for an overwatered orchid to display the signs of dehydration mentioned above, what you are seeing is the consequence of root rot that has progressed so much that the roots cannot take in any water, killing them, and ironically, starving your plant of water. As more roots die off, your orchid may completely lose the ability to absorb necessary water and nutrients through its now compromised roots. The end result is a dehydrated, wrinkled orchid sitting in overly moist, waterlogged potting mix.
Give your orchid an infusion of nutrients with black tea here…
Solution To An Overwatered Orchid:
Prevent Overwatering Your Orchid:
Overwatering an orchid makes it highly susceptible to root rot. As does watering your orchid late in the day when it doesn’t have a chance to dry out before nightfall. An orchid’s delicate roots should not be subjected to soggy, waterlogged conditions. Over time, the roots become soft, mushy, and incapable of doing their job of absorbing water. This leads to the roots dying off and, eventually, the dead, dried, papery roots you observe.
An ounce of prevention is worth a pound of cure, as the saying goes. As you may have gathered, it is easier to fix an underwatered orchid than an overwatered one. Prevent overwatering your orchid in the first place by only watering your plant when its potting medium feels dry. In other words, allow your orchid to dry out between watering. Make sure any pots you use to pot your orchids have proper drainage.
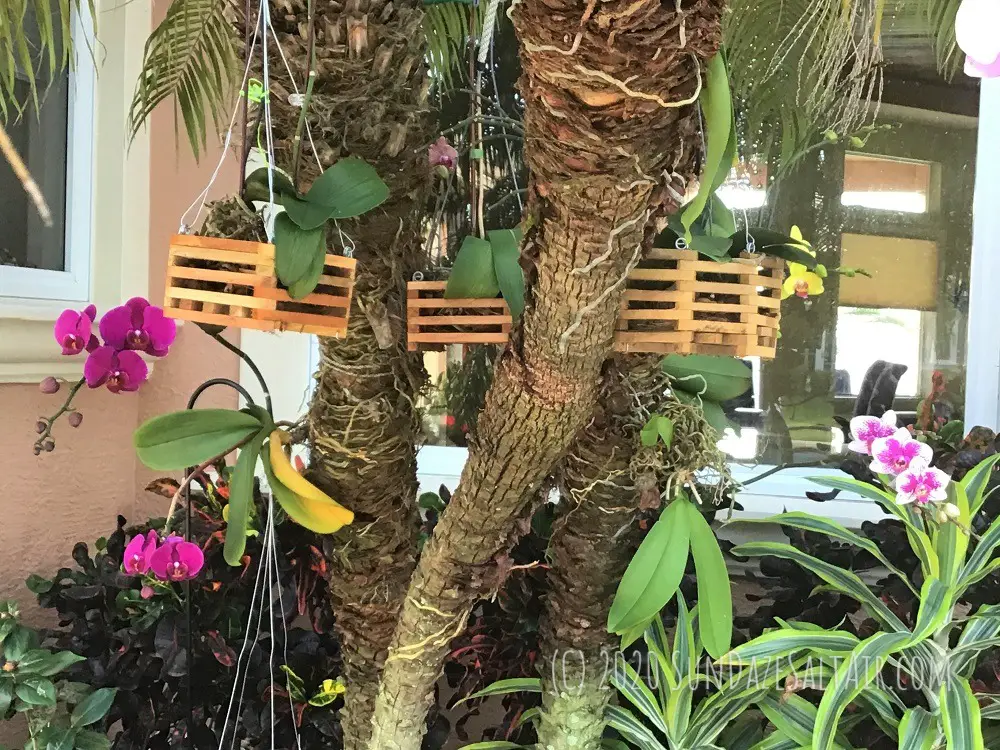
Adequate ventilation is crucial for orchid roots and can help prevent root rot. One suggestion is to use clear, transparent plastic pots with ventilation which allow for regular root inspections. You can also monitor roots regularly by potting your orchids in hanging baskets.
Use appropriate orchid potting mix, and never use soil to pot your orchid. Read more here…
Also, be sure to provide adequate light for your orchid to prevent damp conditions.
Curing damaged roots is a much bigger challenge, but better to identify the problem late than never. Your orchid may still have a chance if you take the following corrective measures…
How To Fix An Overwatered Orchid With Rotting Roots:
Clean-Up & Remove Damaged Roots:
Once you have recognized the problem, you still a have a chance to nip further damage to your orchid in the bud. After you identify signs of root rot, allow you plant to dry out. As stated above, soft, mushy, dark roots indicate root rot has already set in. It is crucial to carefully trim any damaged roots to save your orchid from fungal infection and eventual death. Dead, dried up and shriveled roots that don’t respond to watering, and can’t contribute anything, should be carefully removed. While some may fall off easily, you should use clean scissors to completely remove stubborn ones so as not to damage your plant. You can find more detailed information about trimming your orchid’s dead, compromised roots here.
Refresh Potting Media Regularly: Repot In Fresh Potting Medium In A Clean Pot Or Basket:
Discard the potting medium that your orchid has been sitting in more frequently, and start fresh with new potting mix. Even if the medium looks intact, if it’s old it will contribute to the overly moist conditions that lead to rot, and may harbor bacteria that cause further fungal growth. Choose a potting mix composed of pine bark and perlite for a new dry and hospitable environment for your orchid. Place the fresh potting mix in a thoroughly clean and sterilized pot. Repotting is a relatively simple process but you can read more detail about the nuances of repotting your orchid here.
Water Conservatively:
As stated above, make sure to allow your orchid to dry out between watering. Also, keep watering minimal as your orchid recovers from root rot. Plus, make sure your orchid gets adequate sunlight to discourage rot in the future.
You have now done what you can to rescue your orchid from rot, but be sure to bookmark and follow these tips to avoid a root rot recurrence.
********
Why Are The Leaves Of My Orchid Wrinkled? Orchid Dehydration Cause #3: Insufficient Humidity/Dry Indoor Air
Signs Of An Orchid Receiving Insufficient Humidity:
Like an underwatered orchid, an orchid receiving insufficient humidity will also display wrinkled, flaccid leaves. Low humidity may also result in dry, shriveled roots instead of the plump roots of a healthy, hydrated orchid. Your orchid’s potting medium may also feel dry to the touch.
The dry indoor, climate-controlled air found in most homes is the furthest thing from the moisture-rich, humid air orchids often enjoy in the wild. Similar to how our skin suffers an increased loss of moisture in dry indoor air, orchids also struggle to retain water in low humidity conditions. As dry indoor air increases the rate at which water is lost, monopodial orchids that lack pseudobulbs are especially susceptible to water loss since they lack the ability to store water in their roots.
Epiphytic monopodial orchids instead absorb moisture through their roots from their surroundings. The end result in dry, indoor, climate-controlled air? Dehydrated orchids with wrinkled, shriveled leaves.
Solution To An Orchid Receiving Insufficient Humidity:
Quick & Drastic Method To Cure A Moisture Starved Orchid: Create A “Greenhouse Effect” With The Ziploc Or Plastic Bag Method
If your orchid’s leaves are wrinkled and droopy and its roots beginning to shrivel, you may need to quickly infuse your orchid with water. One way to do this is to create a mini “greenhouse” using a ziploc or plastic bag, depending on the size of your orchid. Placing the bag over your orchid temporarily without closing it all the way raises the humidity inside the bag creating what a dry orchid craves — a very humid micro-climate. Keep your orchid in a shaded area away from direct sunlight and check up on it periodically.
Spending some time in this mini-greenhouse can possibly expedite recovery, plump up leaves and even lengthen your orchid’s life long enough to produce new growth. The increased hydration gives your struggling orchid more precious time to regain its health so it can possibly repair and eventually grow new leaves or roots. Read more detail about the Ziploc bag method here.
Prevent Insufficient Humidity:
While your orchid would love it if you cranked the humidity inside your home and turned it into a greenhouse, I’m sure you would not. You see most orchids thrive in humidity no lower than 40% and all the way up into the steamy 70% range. If you live in a tropical place, well, your orchid would absolutely love if you moved it outside to grow in the balmy, humid tropical air. Obviously, for most temperate zone dwellers, this is not possible except perhaps during hot summer months. However, if you are intent on growing your orchid inside, you do have a few options.
Options To Raise Humidity Indoors:
One option for boosting humidity is to increase it just around your orchid using a humidity tray. You can make one simply by filling a tray or pan of water, inserting rocks in it, and placing it beneath your orchid’s pot. Of course, you don’t want your orchid or its pot to be in standing water, so be sure to keep the pot elevated above the tray. As the water evaporates, it should create a humid little micro-climate around your orchid.
Another option is to purchase a humidifier and set it up nearby. You can also place your orchid near other houseplants grouped together which should naturally increase the humidity level. Lastly, you can place your orchid in a steamy bathroom while the shower is turned on. This is only a temporary solution, obviously, since you wouldn’t want to keep your orchid in the bathroom.
Conclusion: Know How To Spot The Signs To Treat Wrinkled Leaves On Your Orchid Before It’s Too Late
As you have your circulatory system, orchids have their roots, but instead of transporting life blood, they transport water and nutrients that keep your orchid alive. Even if you can’t see them, when an orchid’s roots are unhealthy, the ill effects will show up, including in your orchid’s dehydrated leaves. By paying close attention to roots and leaves and bookmarking this page, you will know what signs to look for and exactly how to treat them. As we have seen, spotting symptoms early is critical to take the right course of action to save your orchid.
********
Do any of your orchids suffer from wrinkled leaves? Share your cure down below.