Stimulate Root Growth On An Orchid With No Roots: How To Grow New Roots On An Orchid
How To Revive An Orchid With Dead Or Dying Roots
There are few things worse for an orchid grower than to discover your delicate plant suddenly appears to have no living, viable roots, and you are helpless as to how to save it. Shriveled roots on an orchid are a source of stress for every orchid grower because without roots your orchid will dehydrate and, eventually, die. In previous posts, I discuss a number of measures you can take to avoid reaching the point where your orchid's roots start dying. In articles about re-potting an orchid and trimming an orchid's dead roots, I discuss the importance of these preventative, prophylactic measures in preventing root rot. However, unfortunately, bad things do happen to even the most conscientious orchid grower, but there is hope. In this post, I share how you can possibly stimulate new root growth on your orchid even when it does not appear to have any functioning roots.
**Discover how you can stimulate orchid root growth with black tea here....
**Note: This post contains affiliate links for which a small commission may be earned if you decide to make a purchase through a link.
Lack Of Functioning Roots Leads To A Dehydrated Orchid
Why Are My Orchid's Roots Shriveled & Dying? Your Orchid Is A Victim Of Root Rot
Whether from poor quality, overly soggy, old potting mix; a pot that's too small; failure to periodically refresh potting mix; or some combination of these, the consequence is inadequate ventilation. The result of inadequate ventilation is you often end up with few functioning roots remaining on your orchid.
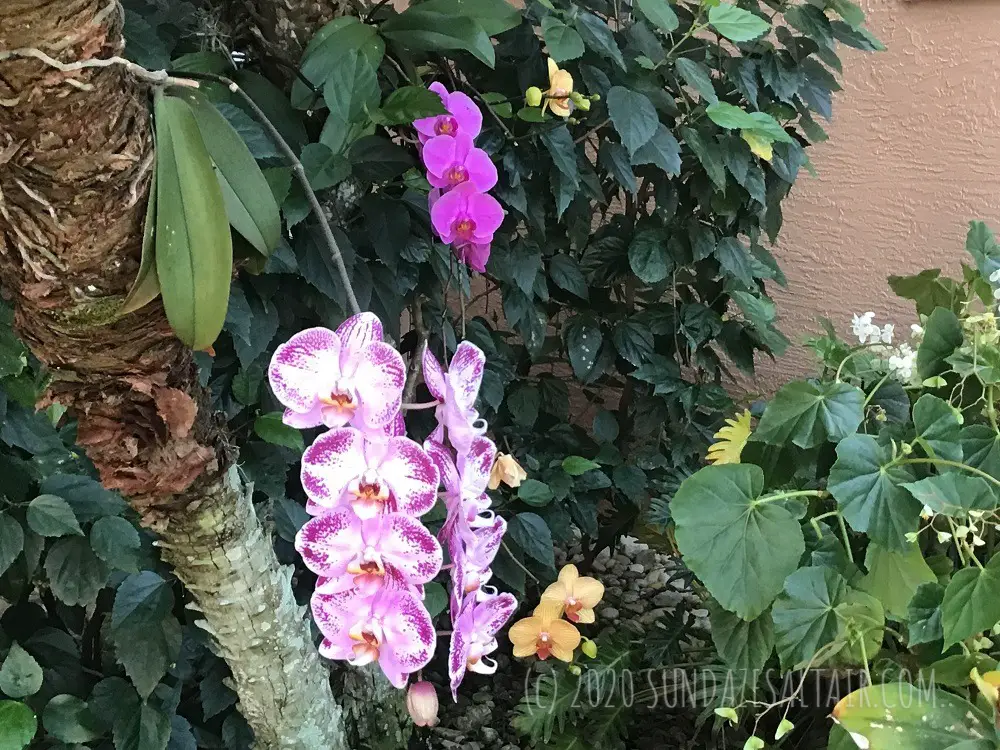
Orchid's Ideal Environment In The Wild
As epiphytes, orchids do not require soil, and instead obtain all the moisture and nutrients they need through their air roots which remain unencumbered and free. Growing in the open air in the wild, orchids attach themselves to trees and other objects such as rocks. Unfortunately, when grown under controlled growing conditions at home which often involves some type of potting mix and pot, poor ventilation is a common occurrence, even for a grower with the best intentions. Root rot results, killing your orchid's roots and their ability to absorb water, ultimately causing your orchid to become severely dehydrated. For further in-depth information on orchid care, you can read more here and here.
TIP: Never use standard soil with orchids, and be careful with too much sphagnum moss as part of your potting media, as it has very high moisture retention.
What Are Some Of The Signs Of A Dehydrated Orchid?
Papery, stringy, brown desiccated, dry roots, as well as mushy brownish roots are obvious root rot signs. Both ultimately lead to dehydration. If you attempt to water your orchid, you should notice that any healthy roots will usually turn color, mostly a variation of light green, and plump up.
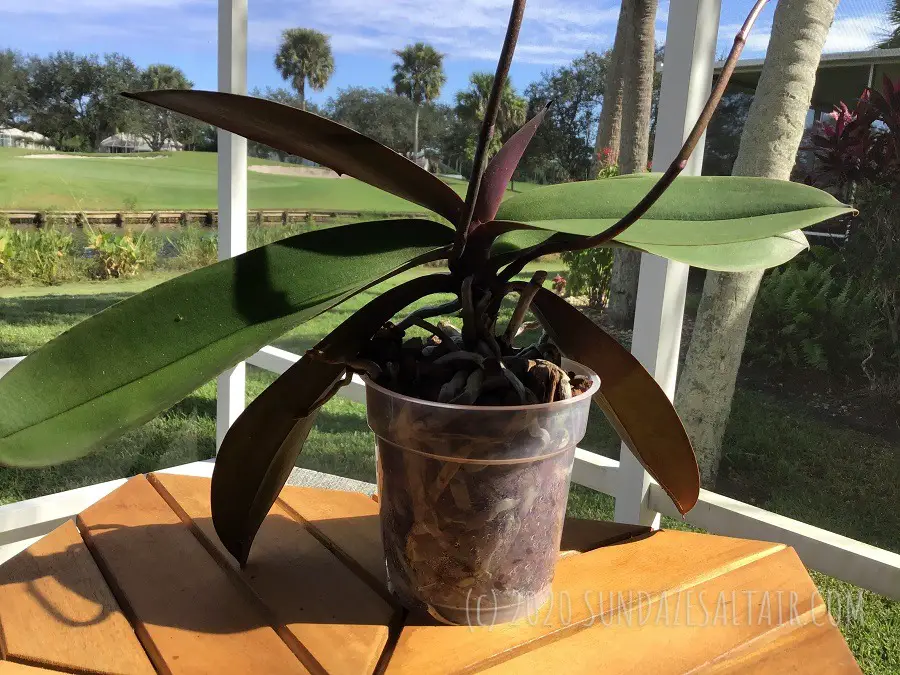
A dehydrated orchid cannot take up sufficient water to sustain itself, resulting in wilted, limp, flaccid and shriveling leaves that begin to curl up on the edges. Lower leaves especially may begin to fall after they wilt. Root rot is the leading cause of your orchid essentially becoming rootless. Without functioning roots, an orchid simply cannot take in the moisture it needs to survive.

For a gorgeous way to display your air plants, including orchids & succulents, consider this vertical garden wall display. Suitable for indoor or outdoor use, these wooden plant holders offer a perfect environment for air-loving orchids while creating a stunning rustic decor. They are available in many sizes to suit your space.
Stimulate Root Growth On An Orchid: How Can You Rehydrate An Orchid With Shriveled Roots?
No orchid grower ever wants to give up on a struggling orchid. When is the point of no return? If you are like most, you won't feel satisfied until you have tried everything. Let's take a look at some steps you can take to attempt to grow or rejuvenate your orchid's roots, and, hopefully, the entire plant. First, assess the situation.
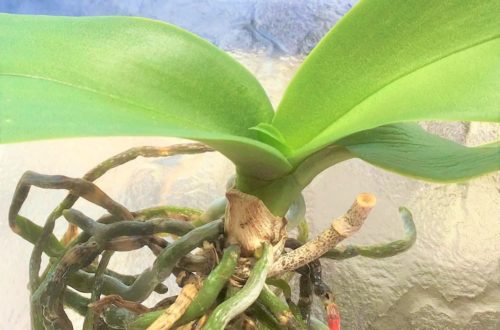
First, Prune To See What You've Got
Remove your orchid from it's old potting mix. You can read more in-depth about repotting a Phalaenopsis here. Mist your orchid so you can easily see which roots plump up or change color when moist, both of which are signs of healthy roots that should be left alone. Then take sterilized scissors and cut away any obviously dead roots since dead tissue that is allowed to remain can cause further decay as well as spoil any new media. Learn more in-depth information about pruning dead roots in this post.
Bottom-line: Removing dead roots from your orchid should not be taken lightly as even ones that may appear dead may just be in need of serious hydration. The more roots an orchid has, the healthier it is, so leave any firm roots of your orchid alone.
You may also cut off any old flower spikes and dead leaves at this point, as well. Discard all old potting media and cuttings.
Disinfect Any Cut Tissue
You can also disinfect any cut tissue on your plant with a 3% hydrogen peroxide solution to prevent bacteria from spreading and kill any fungus spores. Now that you can see what you have left to work with, evaluate what has survived.
Be Thankful For Any Living Roots
If you have any remaining aerial roots, consider yourself, and your orchid, lucky. Since they are free and unpotted, they have what orchids really like best, which is ventilation. As such, remaining aerial roots should help save your orchid by taking in necessary hydration and nutrients. So, if your orchid has at least one healthy root, you can skip the following emergency method below and try hydrating your orchid with traditional methods. When these methods of hydration don't work, if the root is too compromised, try the emergency measure below.
Stimulate Root Growth On An Orchid: Promote Hydration By Creating A Greenhouse Effect With A Ziploc Or Plastic Bag
Now, you want to keep your dehydrated, rootless orchid alive by boosting water absorption which will also, hopefully, speed up the process of your orchid growing a new root.
When Should You Not Use The Ziploc Or Plastic Bag Method To Stimulate Root Growth On An Orchid?
If your orchid has at least one healthy root, your orchid should respond to traditional water culture. I also like to use the black tea method to infuse nutrients into my orchid first, as I find this can give a nutrient turbo charge to any struggling orchids which can inspire root growth. The plastic/Ziploc method is best for orchids that don't respond to traditional hydrating methods, such as orchids with no visibly healthy roots or with sickly, extremely dehydrated roots.
Stimulate Root Growth On An Orchid By Creating A Micro-Climate That Mimics How Orchids Grow In The Wild
To do this you will want to do your best to recreate your orchid's natural habitat. In their natural habitat, orchids grow attached to tree bark or rocks, in the open breeze under forest filtered sunlight in an environment that is usually very high in humidity. In this tropical habitat, there is usually an hour or so of daily rain followed by a drying out period in the open breeze. Sounds like paradise, right? Well, it is, especially for most orchids.
One way to recreate these super high humidity rainforest-like conditions that promote new root growth -- without owning a greenhouse -- is by using the Ziploc or plastic bag technique.
The Ziploc Or Plastic Bag Method To Stimulate New Root Growth On An Orchid Step-By-Step
An orchid typically loses water through its leaves during a gas exchange with its drier surroundings (kind of like your skin in dry winter air). However, if you can make the surrounding environment more humid than inside the leaf, you not only stall this water loss to the environment but you also help hydration enter the leaf. The simulated micro-climate essentially has such high humidity relative to the orchid's leaves, near 100%, that effective water absorption is guaranteed. Hydrating an orchid this way helps lengthen your orchid's life while affording it time and opportunity to hopefully repair itself by growing a new root.
Steps For The Ziploc Bag / Plastic Bag Method Part 1: Prepare To Stimulate Roots On An Orchid
- In order to trap water to create a super humid micro-climate, choose a clear plastic bag or Ziploc bag (for a smaller orchid) that is large enough to comfortably accommodate your orchid without manipulation. Be sure to use this technique only when the temperature is warm since it is the combination of heat and moisture inside the partially sealed bag that creates the "greenhouse" conditions.
- Once you have followed the pruning steps outlined above, your orchid should now be hydrated and fully pruned. Make sure the crown, leaves and stem of your orchid are dry, however, as we do not want to encourage rot, just humidity. Since your orchid was hydrated earlier, any residual moisture will help create the humid micro-climate once placed inside the bag.
Part 2: Create A Faux-Greenhouse To Stimulate Root Growth On An Orchid
- Place your orchid alone in the bag without sealing it completely -- this is vital as you must make sure there is a ventilation hole in the bag. It is extremely important not to seal the bag totally unless you want to create a mold experiment and kill your orchid, which I know you do not want to do. Closing the bag slightly but not all the way will be enough to minimize air escape and create the humid conditions we want while still allowing vital air circulation.
- Add a small amount of well-soaked --not soaking wet-- sphagnum moss into the plastic bag with your orchid. The moss must be well-hydrated (in lukewarm water) because if it is too dry it will actually absorb water meant for your orchid -- the opposite of what we are trying to achieve. If it is too wet, the moss could cause your orchid to be too soggy and possibly rot.
- Be sure to place the orchid and sphagnum moss so they are not touching inside the bag. The reason for this is that we do not want any direct contact with wet moss which risks further rot. We only want the orchid to be surrounded by the moisture that evaporates in the bag.
Part 3: Place Your Orchid In A Warm, Humid But Shaded Spot To Create Its Micro-Climate
- Reminder, it should be reiterated- leave an opening in the bag. Closing the bag partially is enough to create the humid "greenhouse" conditions we want while still allowing air circulation. Air circulation is critical.
- Place the bag with the orchid somewhere outside in a shaded area on a warm day. Too much direct sunlight will make things too steamy -- you don't want to cook your orchid. A lot of sunlight also promotes new leaf growth, and right now we only want to encourage new root growth. Since most orchids are acclimated to higher temperatures, the high temperatures should, hopefully, stimulate root production.
Part 4: Monitor Your Orchid Daily To Determine How Long It Needs To Be In These "Greenhouse" Conditions
- Leave the orchid undisturbed during the day, and remove it at night.** During the day, if the sphagnum moss looks dry, wet it so it is slightly damp and put it back in the bag without touching the orchid. **Now, opinions differ, but when I do the Ziploc/Plastic bag method, while I am anxious to hydrate my dying orchid, I personally don't like to leave it overnight so I always remove the orchid from the bag every night.
- I have heard various recommendations of how long to use this method, but ultimately, the extent of each orchid's root problems is different so it is up to you to monitor the condition of your orchid and discontinue the method when it appears healthy. If you do decide to do this method on your orchid for an extended period of time, I recommend that you remove the orchid from the bag every night and do daily "check ups" for signs of health and root generation.
By one month's time, if the orchid has any chance at growing a new root, it should happen within this time frame. The idea is to keep the orchid alive long enough to allow the orchid and humidity get to work on root production.
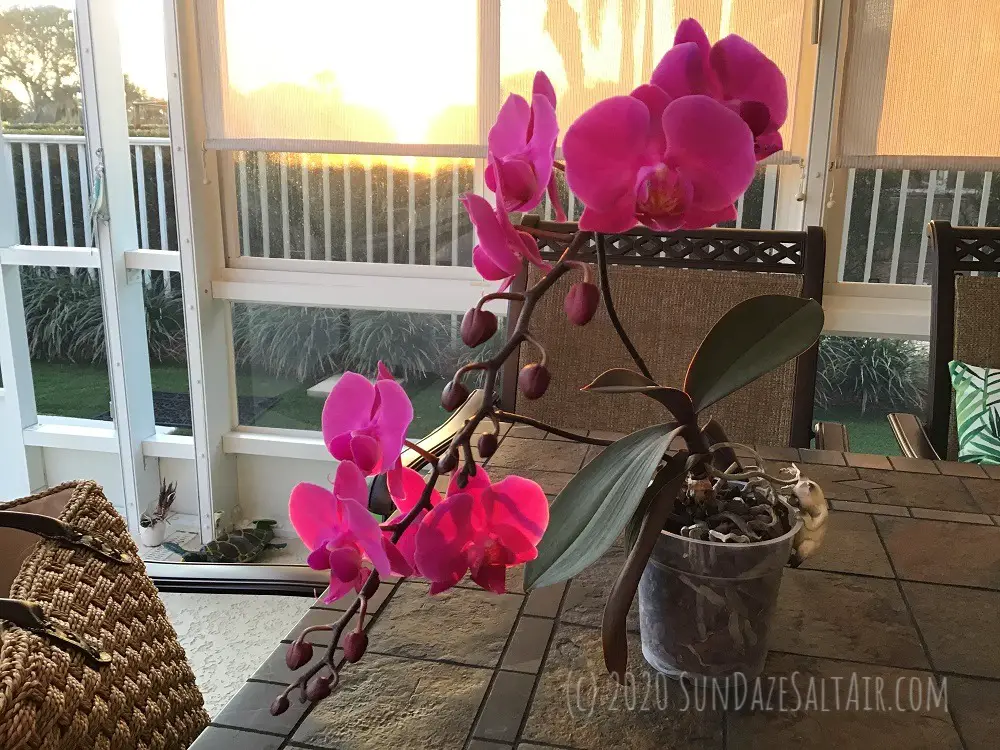
Conclusion: Try The Ziploc / Plastic Bag Method To Save Your Rootless Orchid
Is this method a guarantee of new roots? No, it is not; but it is an emergency method to keep your orchid alive long enough to, hopefully, stimulate root production. It is a chance many orchid lovers are willing to take to give their orchid a second chance at life. I leave it up to you, my fellow orchid grower, to try this method as a last resort to save your "rootless" orchid.
********
Have you saved a rootless orchid using this "faux greenhouse" method, aka "plastic bag" or "Ziploc" method or some other method? If so, please share with other orchid lovers by commenting down below.